
342 lines
26 KiB
Markdown
342 lines
26 KiB
Markdown
Flask is a powerful and flexible micro web framework for Python, ideal for both small and large web projects. It provides a straightforward way to get a web application up and running, with all the features that you need to get started.
|
||
|
||
Over the course of this tutorial, you’ll explore the process of creating a boilerplate for a Flask web project. This boilerplate will serve as a great starting point for any scalable Flask web app that you wish to develop in the future, from basic web pages to complex web applications.
|
||
|
||
**In this tutorial, you’ll learn how to:**
|
||
|
||
- Set up a **Flask project**
|
||
- Create a `"Hello, World!"` **Flask app**
|
||
- Add **multiple pages** with blueprints
|
||
- Leverage **Jinja templates**
|
||
- Store **static files**
|
||
|
||
At the end of this tutorial, you’ll have created a working Flask web application that you can use to bootstrap your future Flask projects.
|
||
|
||
**Get Your Code:** [Click here to download the free source code](https://realpython.com/bonus/flask-project-code/) that shows you how to build a Flask project boilerplate.
|
||
|
||
==**Take the Quiz:**== Test your knowledge with our interactive “Build a Scalable Flask Web Project From Scratch” quiz. You’ll receive a score upon completion to help you track your learning progress:
|
||
|
||
---
|
||
|
||
[
|
||
|
||
|
||
|
||
|
||
|
||
](https://realpython.com/quizzes/flask-project/)
|
||
|
||
**Interactive Quiz**
|
||
|
||
[Build a Scalable Flask Web Project From Scratch](https://realpython.com/quizzes/flask-project/)
|
||
|
||
Test your knowledge of Flask basics, blueprints, project structure, Jinja templates, static files, and setup steps.
|
||
|
||
## Prerequisites[](https://realpython.com/flask-project/#prerequisites "Permanent link")
|
||
|
||
You don’t need any previous knowledge of Flask to complete this project. If you want to learn more about the topics that you encounter in this tutorial, then you’ll find links to resources along the way.
|
||
|
||
However, you should be comfortable using the [terminal](https://realpython.com/terminal-commands/) and have [basic knowledge](https://realpython.com/products/python-basics-book/) of Python. Although it helps to know about [virtual environments](https://realpython.com/python-virtual-environments-a-primer/) and [`pip`](https://realpython.com/what-is-pip/), you’ll learn how to set everything up as you work through the tutorial.
|
||
|
||
[Remove ads](https://realpython.com/account/join/)
|
||
|
||
## Project Overview[](https://realpython.com/flask-project/#project-overview "Permanent link")
|
||
|
||
In this tutorial, you’ll start building a Flask project, which could become a public message board at some point. Here’s what the project will look at the end of this tutorial:
|
||
|
||
You create a basic Flask project with two pages that inherit content and style from a parent template.
|
||
|
||
The Flask project that you’ll build in this tutorial will be very generic. That way, it’s the perfect base for any of your future projects. For example, maybe you’ll want to [add a database](https://realpython.com/flask-database/) or implement [logging and notification messages](https://realpython.com/flask-logging-messages/).
|
||
|
||
## Get Started[](https://realpython.com/flask-project/#get-started "Permanent link")
|
||
|
||
In this section, you’ll prepare the development environment for your Flask project. First, you’ll create a **virtual environment** and install all the **dependencies** that you need for your project.
|
||
|
||
### Create a Virtual Environment[](https://realpython.com/flask-project/#create-a-virtual-environment "Permanent link")
|
||
|
||
In this section, you’ll build your project structure. You can name the root folder of your project any way you like. For example, you could name it `rp_flask_board/` if your ultimate goal is to create a message board. If you have another project in mind, then feel free to name your folder accordingly. Create your folder and navigate into it:
|
||
|
||
`$ mkdir rp_flask_board $ cd rp_flask_board`
|
||
|
||
In this case, you name the root folder of your project `rp_flask_board/`. The files and folders that you create over the course of this series will be located in either this folder or its subfolders.
|
||
|
||
After you navigate to the project folder, it’s a good idea to create and activate a [virtual environment](https://realpython.com/python-virtual-environments-a-primer/). That way, you’re installing any project dependencies not system-wide but only in your project’s virtual environment.
|
||
|
||
Select your **operating system** below and use your platform-specific command to set up a virtual environment:
|
||
|
||
- [Windows](https://realpython.com/flask-project/#windows-1)
|
||
- [Linux + macOS](https://realpython.com/flask-project/#linux-macos-1)
|
||
|
||
`$ python -m venv venv $ source venv/bin/activate (venv) $`
|
||
|
||
With the commands shown above, you create and activate a virtual environment named `venv` by using Python’s built-in `venv` module. The parenthesized `(venv)` in front of the prompt indicates that you’ve successfully activated the virtual environment.
|
||
|
||
### Add Dependencies[](https://realpython.com/flask-project/#add-dependencies "Permanent link")
|
||
|
||
After you’ve created and activated your virtual environment, it’s time to install **Flask** with [`pip`](https://realpython.com/what-is-pip/):
|
||
|
||
`(venv) $ python -m pip install Flask`
|
||
|
||
The Flask **micro web framework** is the only direct dependency that your project requires. This is good news because that means that you can now start coding your Flask project.
|
||
|
||
[Remove ads](https://realpython.com/account/join/)
|
||
|
||
## Initiate Your Flask Project[](https://realpython.com/flask-project/#initiate-your-flask-project "Permanent link")
|
||
|
||
In this section, you’ll spin up a **development server** and display `"Hello, World!"` in the browser with just a few lines of code. Then, you’ll expand your project structure to prepare a scalable Flask web application.
|
||
|
||
### Run the Flask Development Server[](https://realpython.com/flask-project/#run-the-flask-development-server "Permanent link")
|
||
|
||
A Flask project can be as basic as one Python file, which is commonly named `app.py`. Give it a try by creating `app.py` in `rp_flask_board/` and adding the following content:
|
||
|
||
`app.py`
|
||
|
||
`from flask import Flask app = Flask(__name__) @app.route("/") def home(): return "Hello, World!" if __name__ == "__main__": app.run(host="0.0.0.0", port=8000, debug=True)`
|
||
|
||
You import the `Flask` class, giving the application access to the Flask functionality. You then create a Flask application instance named `app`. Next, you connect the URL route `"/"` to the `home()` function by [decorating](https://realpython.com/primer-on-python-decorators/) it with `@app.route("/")`. Functions like these are commonly referred to as **views** in Flask. In this case, the `home` view returns a `"Hello, World!"` string that the browser can display.
|
||
|
||
**Note:** Flask’s development server defaults to port `5000`. But on newer macOS versions, the macOS [AirPlay receiver](https://en.wikipedia.org/wiki/AirPlay#Receivers) uses this port. Above, you’ve changed the port of your Flask app with `port=8000`. If you want, you can [change the AirPlay receiver preferences on your Mac](https://support.apple.com/guide/mac-help/change-airplay-receiver-preferences-on-mac-mchl15c9e4b5/mac) instead.
|
||
|
||
With the Python virtual environment active, you can run your application with this command in the directory containing the `app.py` file:
|
||
|
||
`(venv) $ python app.py`
|
||
|
||
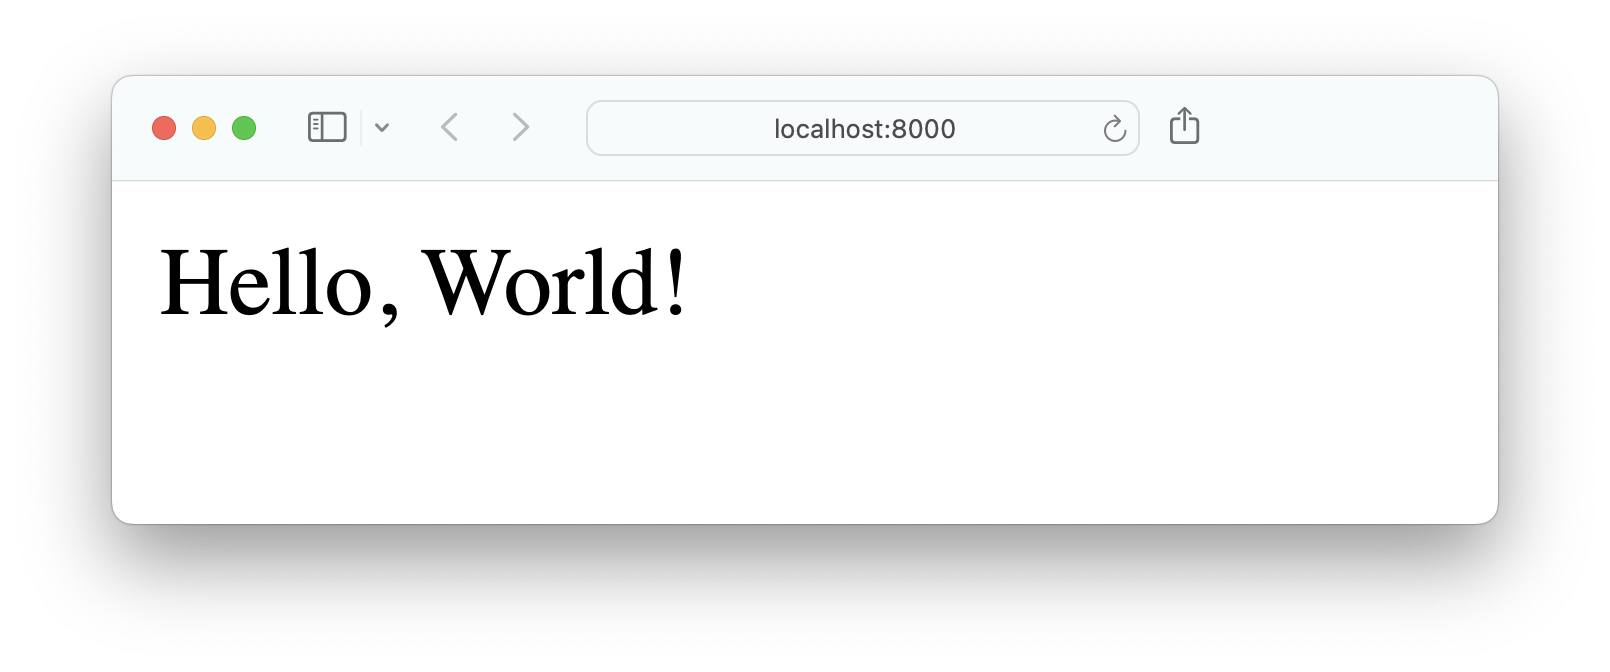
When you run `app.py`, a web server will start on port 8000. If you open a browser and navigate to `http://localhost:8000`, then you should see _Hello, World!_ displayed:
|
||
|
||
[](https://files.realpython.com/media/helloworld.c5d1d5655deb.png)
|
||
|
||
Congratulations, your web server is running! You can stop the development server by pressing Ctrl+C in your terminal.
|
||
|
||
Your current project structure is great for starting a Flask project. However, if you want to work on bigger projects, this structure can be limiting because you’d need to add more and more code to `app.py`. Instead, you’ll adjust the structure a bit to create a more scalable Flask project.
|
||
|
||
### Transform Your Project Into a Package[](https://realpython.com/flask-project/#transform-your-project-into-a-package "Permanent link")
|
||
|
||
[Packages](https://realpython.com/python-modules-packages/) are useful for structuring Python code into logical groupings for large programs. Because your web project can grow large, too, transforming your project into a package makes sense. Since you’re just at the start of the project, your to-do list to create the package has only three tasks:
|
||
|
||
1. Creating a package folder named `board/`
|
||
2. Moving `app.py` into `board/`
|
||
3. Renaming `app.py` to `__init__.py`
|
||
|
||
You can perform these tasks by hand or use the [terminal](https://realpython.com/terminal-commands/) to perform all three steps with two commands:
|
||
|
||
`(venv) $ mkdir board (venv) $ mv app.py board/__init__.py`
|
||
|
||
With the commands above, you create the `board/` subfolder. Then, you move `app.py` into `board/` and rename it to `__init__.py`.
|
||
|
||
By now, your Flask project structure should look like this:
|
||
|
||
`rp_flask_board/ │ └── board/ └── __init__.py`
|
||
|
||
With the new package structure in place, make sure that you stay in the `rp_flask_board/` folder and run your Flask project with this command:
|
||
|
||
`(venv) $ python -m flask --app board run --port 8000 --debug`
|
||
|
||
With the command above, you’re telling Flask to look for an app named `board` and serve it in debug mode on port `8000`. When you visit `http://localhost:8000`, you see the same _Hello, World!_ displayed as before.
|
||
|
||
[Remove ads](https://realpython.com/account/join/)
|
||
|
||
### Work With an Application Factory[](https://realpython.com/flask-project/#work-with-an-application-factory "Permanent link")
|
||
|
||
An **application factory** in Flask is a design pattern that’s highly beneficial for scaling Flask projects. With an application factory, you can create and configure your Flask project flexibly and efficiently, making it easier to develop, test, and maintain as it grows and evolves.
|
||
|
||
Instead of having your application’s code at the root level of your `__init__.py` file, you’ll work with a function that returns your application. To do so, replace the content of `__init__.py` with the content below:
|
||
|
||
`board/__init__.py`
|
||
|
||
`from flask import Flask def create_app(): app = Flask(__name__) return app`
|
||
|
||
After importing `Flask`, you create a function named `create_app()` that initializes the app and returns it. The `create_app()` function is your application factory.
|
||
|
||
With an application factory, your project’s structure becomes more organized. It encourages you to separate different parts of your application, like routes, configurations, and initializations, into different files later on. This encourages a cleaner and more maintainable codebase.
|
||
|
||
To see the benefits of an application factory in action, you’ll create your first blueprint in the next section.
|
||
|
||
## Leverage Blueprints[](https://realpython.com/flask-project/#leverage-blueprints "Permanent link")
|
||
|
||
As your Flask project grows, you have lots of view functions and other related bits of code that work together. Instead of adding all these directly to a basic `app.py` file, you can create **blueprints** that you register in your application factory.
|
||
|
||
[Blueprints](https://realpython.com/flask-blueprint/) are modules that contain related views that you can conveniently import in `__init__.py`. For example, you’ll have a blueprint that stores the main pages of your project.
|
||
|
||
Create a file named `pages.py` in the `board/` folder and add the content below:
|
||
|
||
`board/pages.py`
|
||
|
||
`from flask import Blueprint bp = Blueprint("pages", __name__) @bp.route("/") def home(): return "Hello, Home!" @bp.route("/about") def about(): return "Hello, About!"`
|
||
|
||
After importing `Blueprint`, you create an instance of it named `bp`. The first argument, `"pages"`, is the name of your blueprint. You’ll use this name to identify this particular blueprint in your Flask project. The second argument is the blueprint’s `__name__`. You’ll use this later when you import `pages` into `__init__.py`.
|
||
|
||
Then, you define two routes, one as the `home` view and the other as the `about` view. Each of them returns a string to indicate on which page you are on.
|
||
|
||
Before you can visit the pages, you need to connect the `pages` blueprint with your Flask project:
|
||
|
||
`board/__init__.py`
|
||
|
||
`from flask import Flask from board import pages def create_app(): app = Flask(__name__) app.register_blueprint(pages.bp) return app`
|
||
|
||
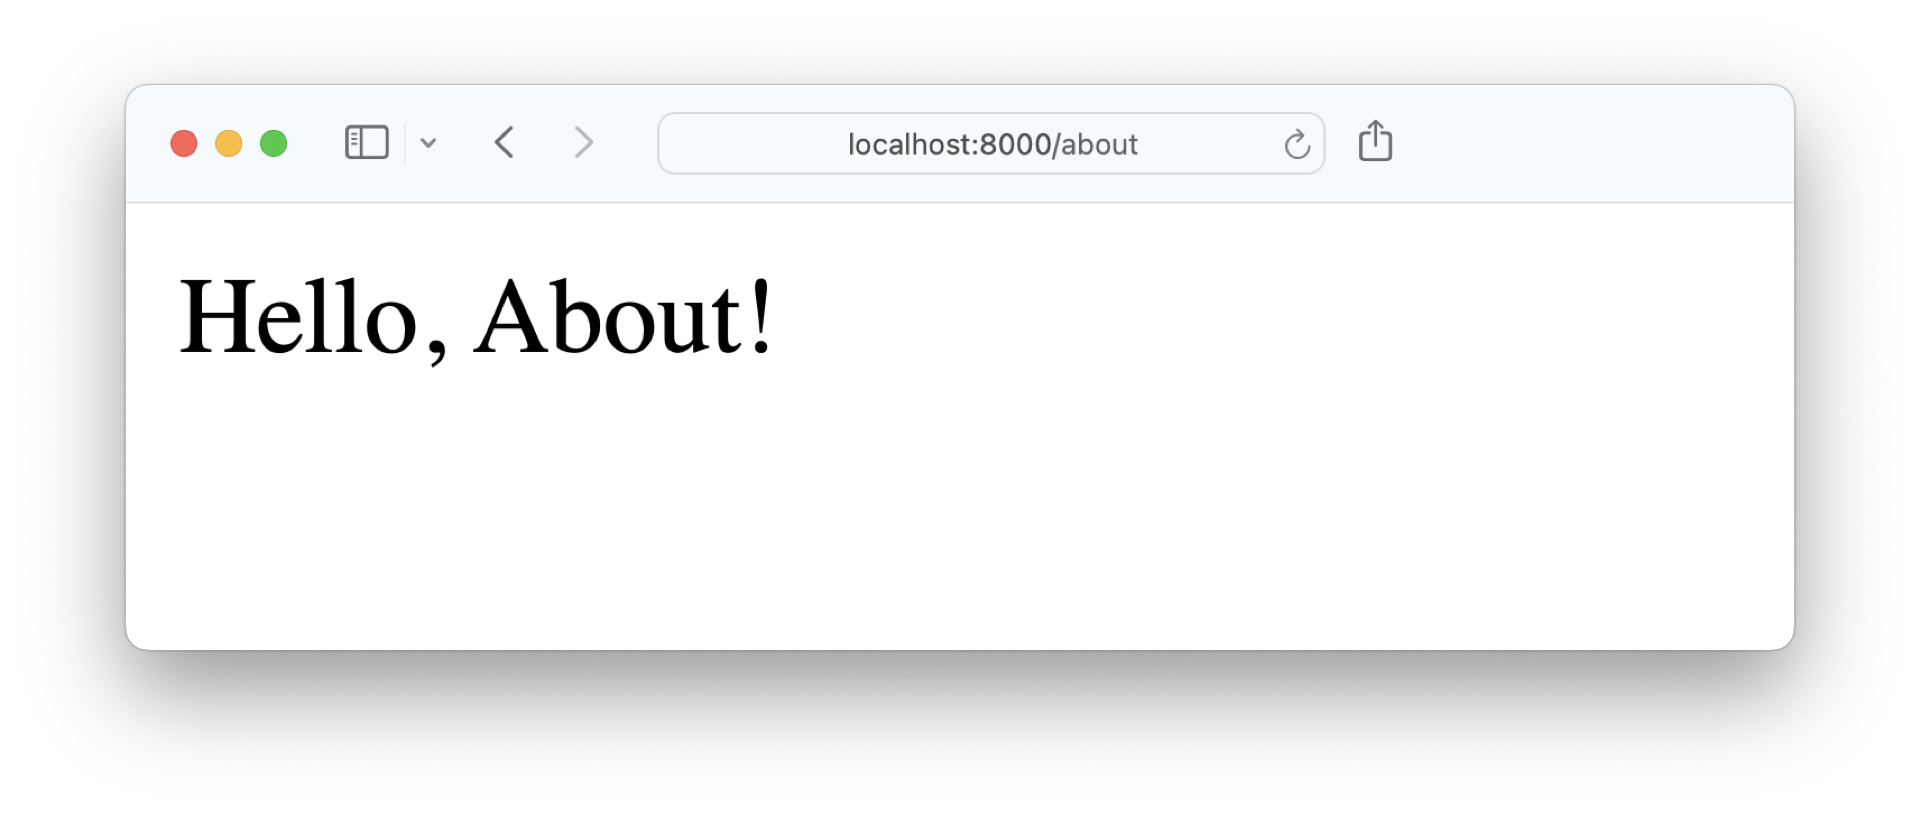
Once you’ve imported and registered the `pages` blueprint in your application factory, you can visit the routes that you defined in `pages.py` in your browser. When you visit `http://localhost:8000/about`, then you can see the _Hello, About!_ string:
|
||
|
||
[](https://files.realpython.com/media/02-hello-about.5a86d9ac9395.png)
|
||
|
||
If the main purpose of your Flask project were to just display plain strings, then you’d be done. However, it’s more fun to actually display dynamic content to your users. That’s when templates come into play.
|
||
|
||
## Introduce Templates[](https://realpython.com/flask-project/#introduce-templates "Permanent link")
|
||
|
||
Templates are [HTML files](https://realpython.com/html-css-python/#create-your-first-html-file) with the capability of rendering dynamic content sent over from your Flask views. For this, Flask uses the popular [Jinja](https://realpython.com/primer-on-jinja-templating/) **template engine**, which you already installed as a dependency when you installed Flask.
|
||
|
||
With a template engine like Jinja, you can embed Python-like expressions into your templates to create dynamic web content. You can use loops, conditionals, and variables directly in your templates.
|
||
|
||
Jinja also supports **template inheritance**, allowing the creation of a **base template** that you can extend in **child templates**, promoting code reuse and a consistent layout across different pages of your project.
|
||
|
||
[Remove ads](https://realpython.com/account/join/)
|
||
|
||
### Build a Base Template[](https://realpython.com/flask-project/#build-a-base-template "Permanent link")
|
||
|
||
Create a new template named `base.html` in a `templates/` directory inside `board/`:
|
||
|
||
`board/templates/base.html`
|
||
|
||
`<!DOCTYPE html> <html lang="en"> <head> <title>Message Board - {% block title %}{% endblock title %}</title> </head> <body> <h1>Message Board</h1> <section> <header> {% block header %}{% endblock header %} </header> <main> {% block content %}<p>No messages.</p>{% endblock content %} </main> </section> </body> </html>`
|
||
|
||
Commonly, the Jinja base template is named `base.html`, and it contains the main HTML structure of your web pages. The main structure of `base.html` is similar to a normal HTML page. You start by declaring the [doctype](https://developer.mozilla.org/en-US/docs/Glossary/Doctype), wrapping everything in `<html>` tags, and setting the [`lang` attribute](https://developer.mozilla.org/en-US/docs/Web/HTML/Global_attributes/lang).
|
||
|
||
Then you go on to add `<head>` and `<body>` with some other nested elements. In line 4, you set the title of your project to _Message Board_. The empty `title` block gives you the opportunity to extend the title with a child template.
|
||
|
||
**Note:** The message board is just an example for a generic Flask project. Feel free to give your Flask project a more fitting name.
|
||
|
||
In line 10, you set the `header` block. If a child template doesn’t contain a `header` block, then `<header>` will stay empty.
|
||
|
||
By providing default content inside the `content` block in line 13, you either display the _No messages_ hint or show the content of the child template.
|
||
|
||
### Add Your Child Templates[](https://realpython.com/flask-project/#add-your-child-templates "Permanent link")
|
||
|
||
Your base template is designed to provide a consistent structure for your project while allowing flexibility in specific parts of the content through Jinja’s block functionality. Next, create the child templates that extend `base.html` and fill in these blocks with their specific content.
|
||
|
||
Start with the template for your `home` view by creating a `home.html` file in a `pages/` subfolder of your `templates/` folder:
|
||
|
||
`board/templates/pages/home.html`
|
||
|
||
`{% extends 'base.html' %} {% block header %} <h2>{% block title %}Home{% endblock title %}</h2> {% endblock header %} {% block content %} <p> Learn more about this project by visiting the <a href="{{ url_for('pages.about') }}">About page</a>. </p> {% endblock content %}`
|
||
|
||
To connect the child template with its parent template, you must add an `{% extends %}` tag at the top of the file.
|
||
|
||
Child templates also contain `{% block %}` tags. By providing the block’s name as an argument, you’re connecting the blocks from the child template with the blocks from the parent template.
|
||
|
||
When you use [`url_for()`](https://flask.palletsprojects.com/en/3.0.x/api/#flask.Flask.url_for), Flask creates the full URL to the given view for you. This means that if you change the route in your Python code, then the URL in your templates updates automatically.
|
||
|
||
Continue by creating a file named `about.html` in the same `pages/` directory:
|
||
|
||
`board/templates/pages/about.html`
|
||
|
||
`{% extends 'base.html' %} {% block header %} <h2>{% block title %}About{% endblock title %}</h2> {% endblock header %} {% block content %} <p>This is a message board for friendly messages.</p> {% endblock content %}`
|
||
|
||
Just like in `home.html`, you do something nifty with the `title` block. You add the page’s title inside the `header` block and wrap it within `title`. Jinja will understand this structure and render the page’s title in the `header` and `title` blocks.
|
||
|
||
With both child templates in place, you need to adjust your views to return the templates instead of the plain strings. Hop over to `pages.py` and adjust `home()` and `about()`:
|
||
|
||
`board/pages.py`
|
||
|
||
`from flask import Blueprint, render_template bp = Blueprint("pages", __name__) @bp.route("/") def home(): return render_template("pages/home.html") @bp.route("/about") def about(): return render_template("pages/about.html")`
|
||
|
||
After importing Flask’s [`render_template()`](https://flask.palletsprojects.com/en/3.0.x/api/#flask.render_template), you can use the function to return the `home.html` and `about.html` templates that you placed in the `templates/pages/` folder.
|
||
|
||
By default, Flask expects your templates to be in a `templates/` directory. Therefore, you don’t need to include `templates/` in the path of the templates.
|
||
|
||
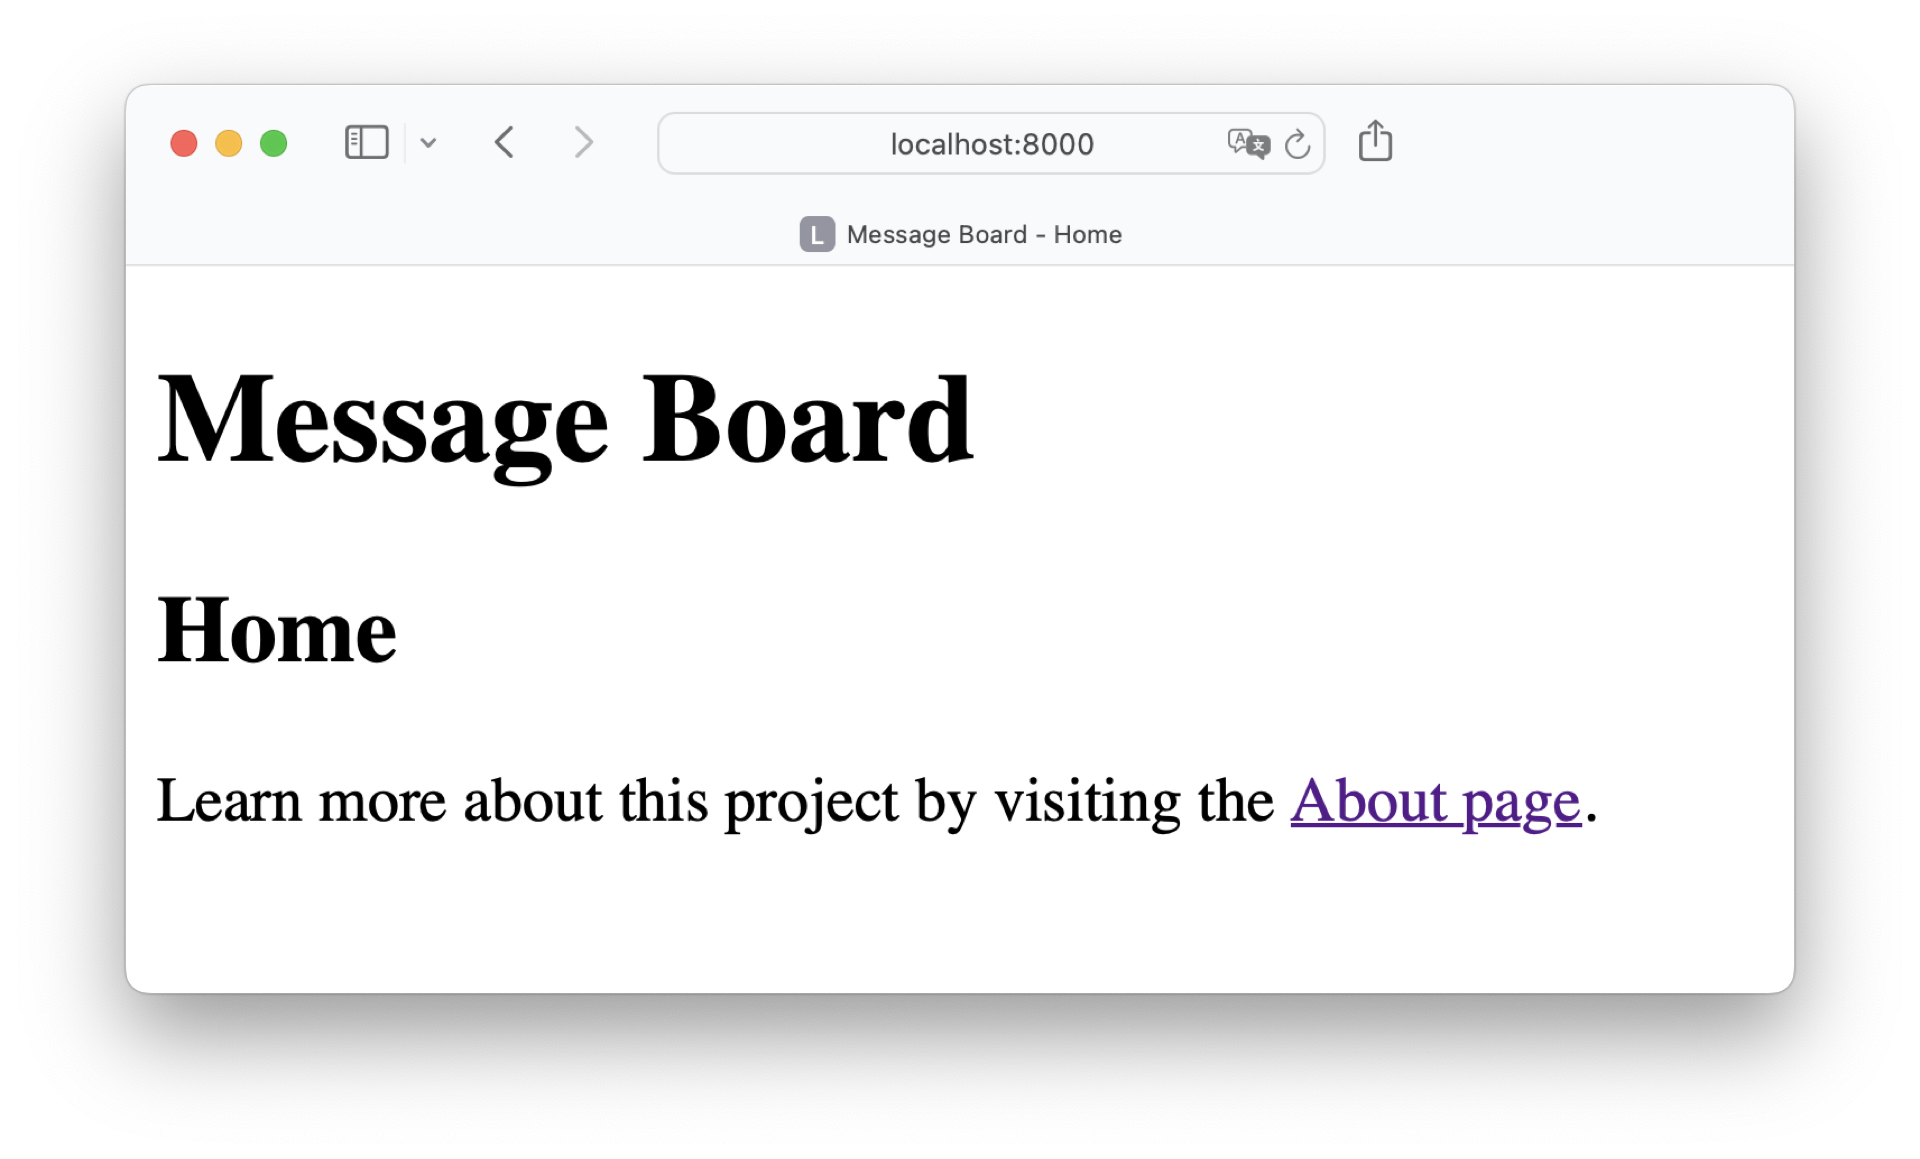
To verify that your templates work, restart your Flask development server and visit `http://localhost:8000`:
|
||
|
||
[](https://files.realpython.com/media/03-home.05daf2dda36d.png)
|
||
|
||
Your _Home_ page shows the dynamic title.
|
||
|
||
When you visit your _Home_ page, then you can click the link to the _About_ page. Since there’s no link to the _Home_ page, you’d need to either use the _Back_ button of your browser or enter the URL manually in the address bar.
|
||
|
||
It seems like it’s time to elevate the user experience and include a navigation menu in your project!
|
||
|
||
[Remove ads](https://realpython.com/account/join/)
|
||
|
||
## Improve the User Experience[](https://realpython.com/flask-project/#improve-the-user-experience "Permanent link")
|
||
|
||
A good user experience is crucial in any web application. It ensures that users find the application not only convenient to use, but also enjoyable.
|
||
|
||
In the upcoming sections, you’ll add a navigation menu and style your web application. While doing so, notice how these additions can contribute to a better user experience.
|
||
|
||
### Include a Navigation Menu[](https://realpython.com/flask-project/#include-a-navigation-menu "Permanent link")
|
||
|
||
The navigation of a website is usually displayed on every page. With your base and child template structure, it’s best to add the code for the navigation menu into `base.html`.
|
||
|
||
Instead of adding the navigation menu code directly into `base.html`, you can leverage the `{% include %}` tag. By referencing another template with `{% include %}`, you’re loading the whole template into that position. If you need to make any changes in the navigation, then you know exactly where to look. Additionally, you can decide to include your navigation template on a different part of the page, for example when you [design a `404` error template](https://realpython.com/flask-logging-messages/#design-the-404-error-template).
|
||
|
||
**Included templates** are partials that contain a fraction of the full HTML code. To indicate that a template is meant to be included, you can prefix its name with an underscore (`_`).
|
||
|
||
Follow the prefix-based naming scheme and create a new template named `_navigation.html` in your `templates/` folder:
|
||
|
||
`templates/_navigation.html`
|
||
|
||
`<nav> <ul> <li><a href="{{ url_for('pages.home') }}">Home</a></li> <li><a href="{{ url_for('pages.about') }}">About</a></li> </ul> </nav>`
|
||
|
||
Note that `_navigation.html` contains neither an `{% extends %}` tag nor any `{% block %}` tags. You can focus solely on how you want to render your navigation menu.
|
||
|
||
Just like above, you use `url_for()`, and Flask creates the full URL to the given view for you. So, even when you decide to change the route to one of your pages, the navigation menu will still work.
|
||
|
||
Include `_navigation.html` in `base.html` to display your navigation menu on all of your pages:
|
||
|
||
`templates/base.html`
|
||
|
||
`<!DOCTYPE html> <html lang="en"> <head> <title>Message Board - {% block title %}{% endblock title %}</title> </head> <body> <h1>Message Board</h1> {% include("_navigation.html") %} <section> <header> {% block header %}{% endblock header %} </header> <main> {% block content %}<p>No messages.</p>{% endblock content %} </main> </section> </body> </html>`
|
||
|
||
Instead of adding the navigation menu code directly into `base.html`, you include `_navigation.html` in your website’s header.
|
||
|
||
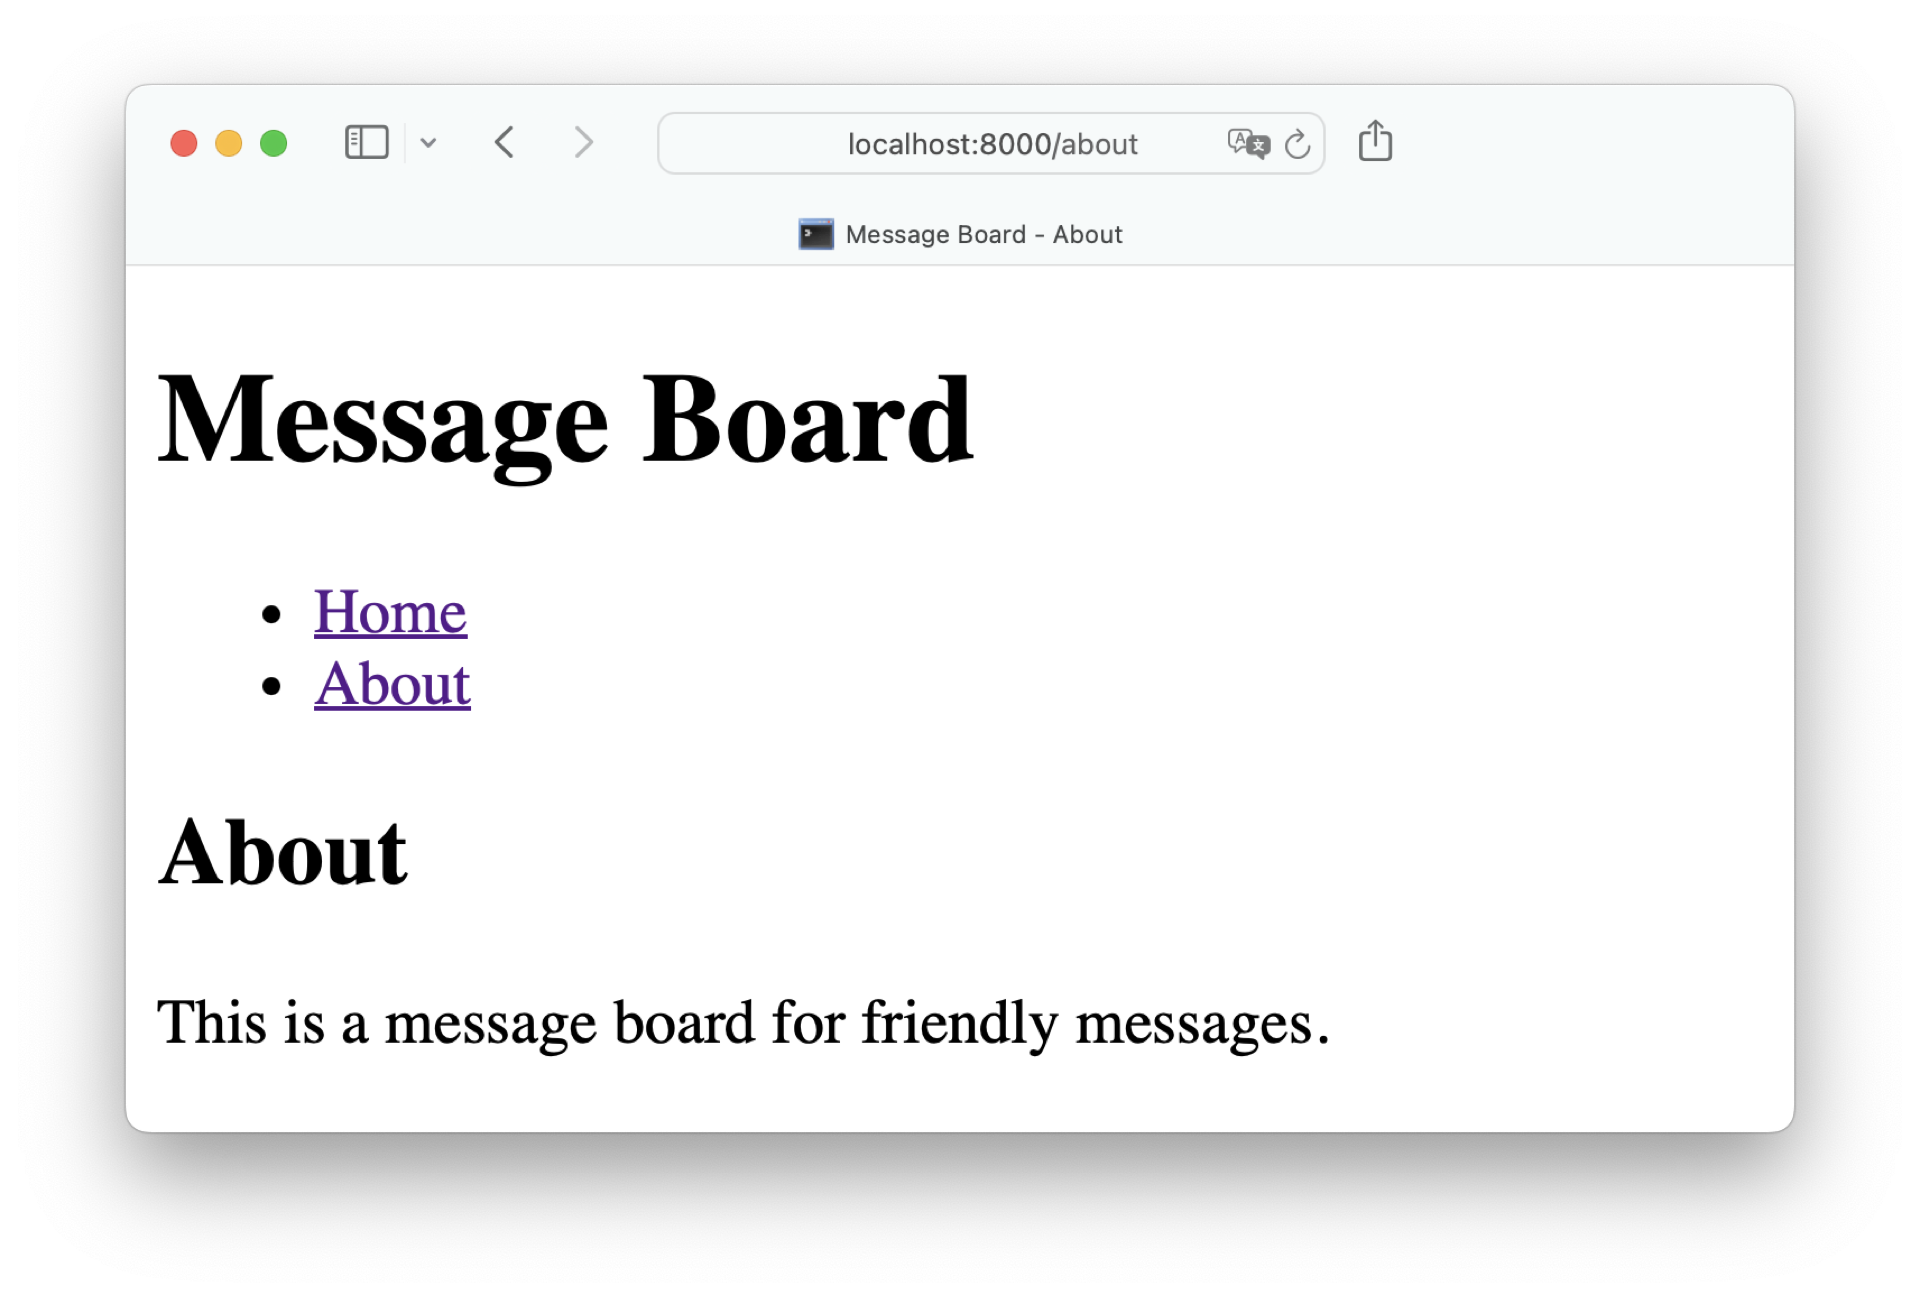
Visit `http://localhost:8000/about` to check out your new navigation menu:
|
||
|
||
[](https://files.realpython.com/media/04-about-with-menu.3aa627239a41.png)
|
||
|
||
Since both `home.html` and `about.html` extend `base.html`, you didn’t need to make any changes in these templates to make the navigation menu appear. That’s template inheritance in action!
|
||
|
||
But wait, there’s more! In the next section, you’ll leverage template inheritance to add consistent styling to your web project.
|
||
|
||
### Make Your Project Look Nice[](https://realpython.com/flask-project/#make-your-project-look-nice "Permanent link")
|
||
|
||
The templates in your project provide the logic and structure for the **front end** of your project. With the help of **Cascading Style Sheets (CSS)**, you can [style the content](https://realpython.com/html-css-python/#style-your-content-with-css).
|
||
|
||
In Flask projects, you commonly save CSS files in a `static/` directory. In this project, you’ll only work with one CSS file named `styles.css`. But if you decide to expand the project at some point, you can also use this folder to store images or [JavaScript files](https://realpython.com/python-vs-javascript/).
|
||
|
||
Create a new directory named `static/` inside of `board/` and place a file named `styles.css` in it with the **CSS declarations** below:
|
||
|
||
`board/static/styles.css`
|
||
|
||
`* { box-sizing: border-box; } body { font-family: sans-serif; font-size: 20px; margin: 0 auto; text-align: center; } a, a:visited { color: #007bff; } a:hover { color: #0056b3; } nav ul { list-style-type: none; padding: 0; } nav ul li { display: inline; margin: 0 5px; } main { width: 80%; margin: 0 auto; }`
|
||
|
||
The CSS declarations above ensure that the web elements are properly spaced and sized, making the website look organized and more convenient to navigate.
|
||
|
||
The color scheme for the links provides a visual cue to users about clickable elements. The font choice and size contribute to readability. The overall layout and alignment of the web elements give the website a clean and modern look.
|
||
|
||
With the style sheet in place, you need to add a link to `styles.css` inside `<head>` of `base.html`:
|
||
|
||
`templates/base.html`
|
||
|
||
`<!DOCTYPE html> <html lang="en"> <head> <title>Message Board - {% block title %}{% endblock title %}</title> <link rel="stylesheet" href="{{ url_for('static', filename='styles.css') }}"> </head> <body> <!-- ... --> </body> </html>`
|
||
|
||
You can reference a CSS file with a `<link>` tag in the header of your HTML page. Just like before, you use `url_for()` to create the full URL for the `href` attribute. To link to the `styles.css` file stored in your Flask project’s `static/` folder specifically, you use the `filename` argument.
|
||
|
||
By adding the CSS file reference to `base.html`, you’re again taking advantage of the inheritance mechanism that Jinja templates provide. You only need to add `styles.css` in your base template to make it present in your child templates.
|
||
|
||
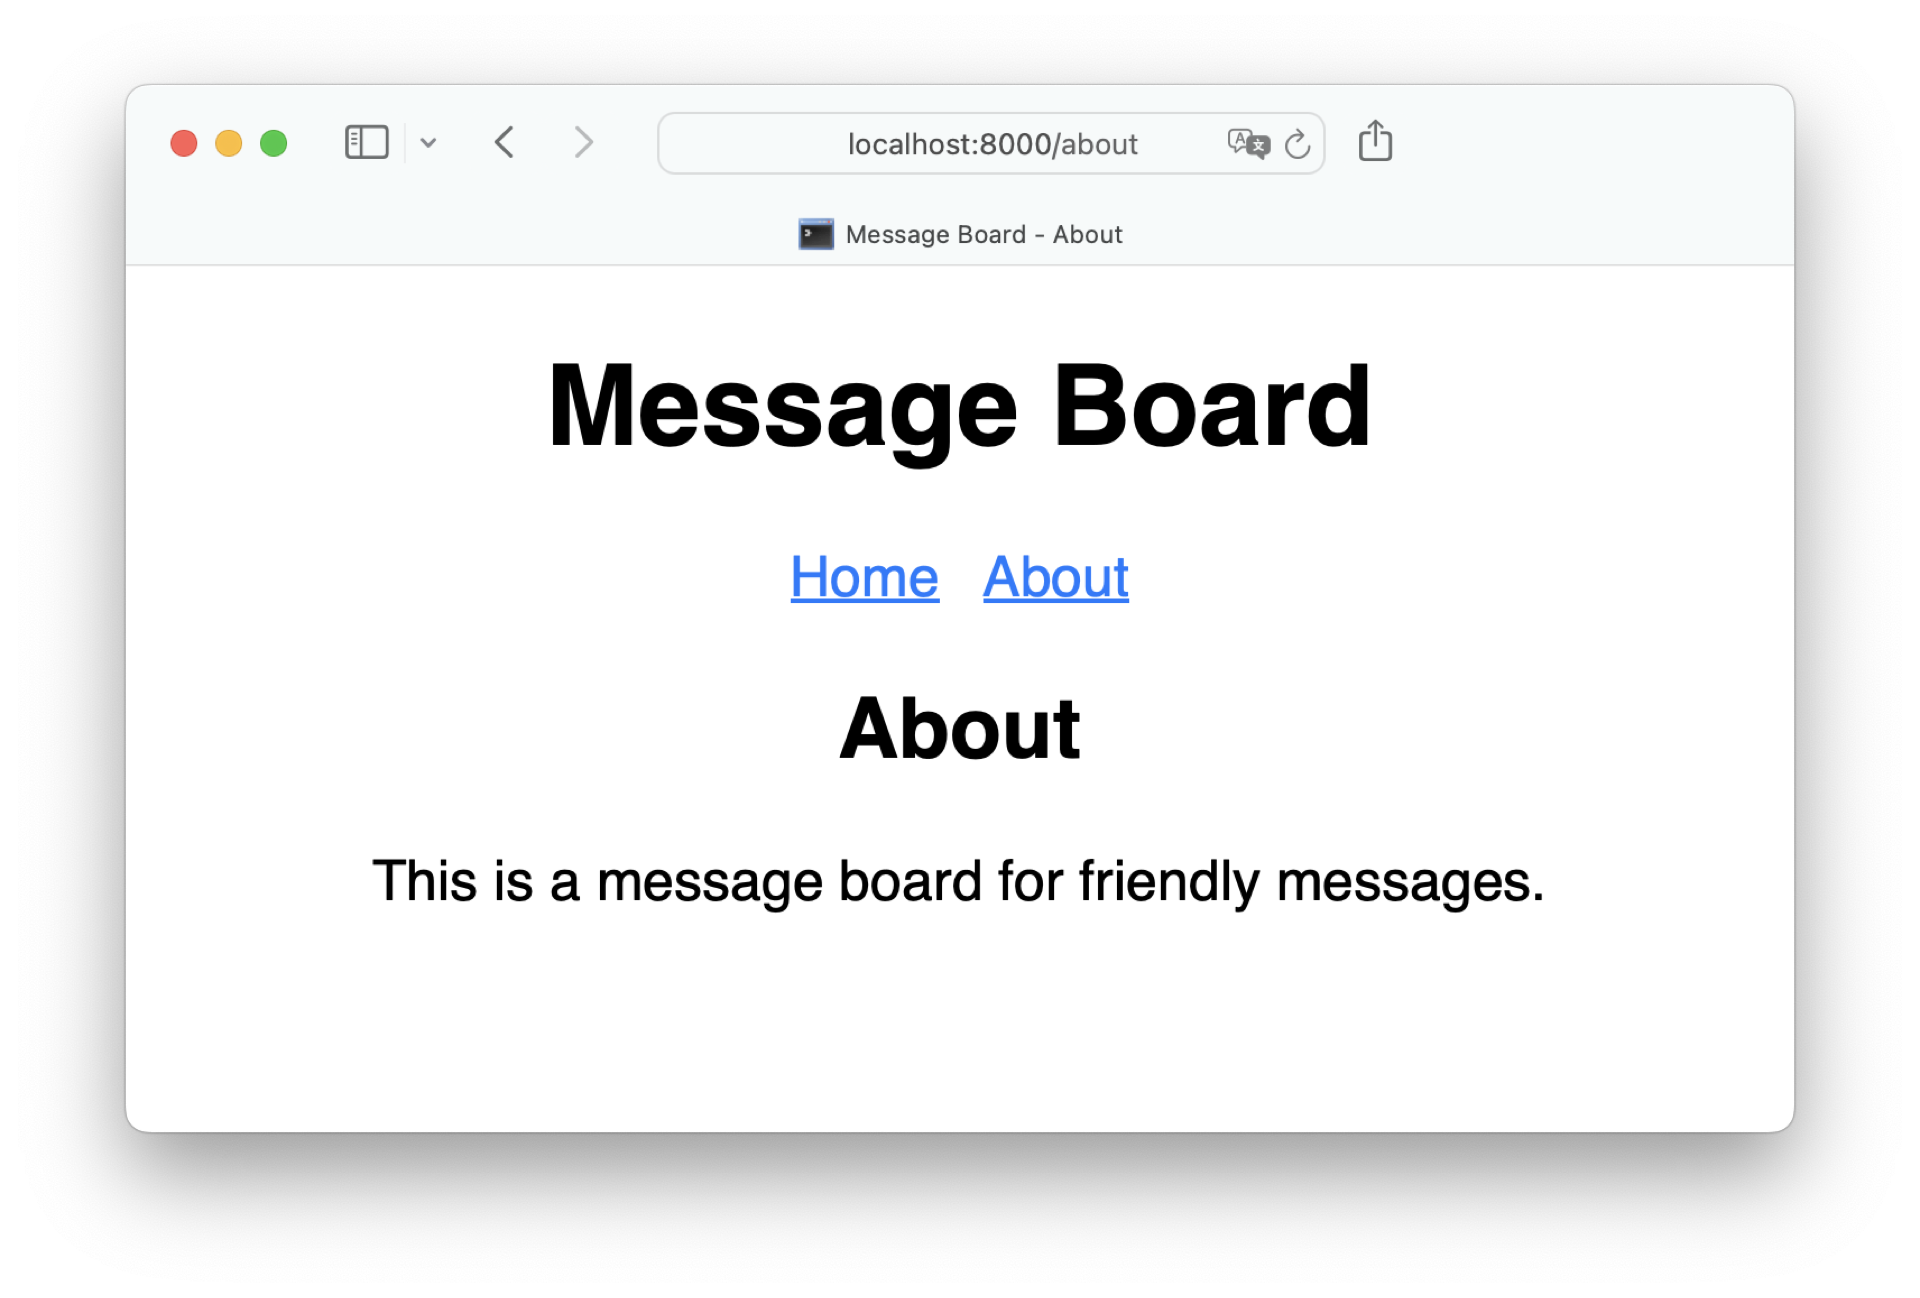
You may need to restart your Flask development server again to see your styling in action:
|
||
|
||
[](https://files.realpython.com/media/05-about-styled.5f9a679b6b21.png)
|
||
|
||
With some minimal styling, your Flask web project is starting to look like a finished web app. Feel free to add more pages and content on your own. Once you’re finished, you can continue to work on the message board project by [adding a database](https://realpython.com/flask-database/) and accepting posts from your users.
|
||
|
||
[Remove ads](https://realpython.com/account/join/)
|
||
|
||
## Conclusion[](https://realpython.com/flask-project/#conclusion "Permanent link")
|
||
|
||
Congratulations on successfully setting up a Flask project. This working Flask web project is a great starting point for any future Flask projects that you may have. By understanding these foundational concepts, you’re now well equipped to tackle more complex projects and further explore the capabilities of Flask.
|
||
|
||
**In this tutorial, you’ve learned how to:**
|
||
|
||
- Set up a **Flask project**
|
||
- Create a `"Hello, World!"` **Flask app**
|
||
- Add **multiple pages**
|
||
- Leverage **Jinja templates**
|
||
- Store **static files**
|
||
|
||
You’ve successfully created a working Flask web application that you can use to bootstrap your future Flask projects. |